Getting Started with Neo4J

Neo4J is a fully featured open source graph database built atop the JVM offering full ACID compliance. What sets it apart is the excellent tooling provided by Neo Technology, including a web UI for visualising queries, great windows support and, perhaps my favourite part, the Cypher query language.
Data in Neo4J consists of 4 core elements:
- Graph – the database itself collecting nodes, relationships and properties
- Nodes – think of these as standard rows in a table
- Relationships – associations between nodes
- Properties – key/value pairs that can be stored on both nodes and relationships

Each node can have N directed relationships to other nodes storing how each element is associated with the others.
Neo4J’s strength lies in it’s loose structure allowing for complex relationships lending themselves to rapid analysis. Once you’ve set up your graph database actually querying the data is highly logical due to the graphical format of the Cypher language we’ll explore later.
Setting up a Neo4J Server
Firstly we need to download the Neo4J server; there is a free community edition available here.
Run the executable to install Neo4J on your local machine, once finished you will get the server start up prompt pointing the database and asking you to start the server.
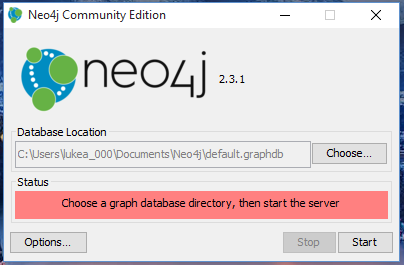
Clicking Start will launch the background service, upon finishing you can go to http://localhost:7474 (default port) to access the Neo4J UI.
On loading the UI you’ll be asked to give a user name and password (the default will be shown), follow the instructions then we’re ready to start cooking.
There’s plenty of great client libraries for Neo4J here (including .Net, Java, Python, Ruby and more) however the UI has everything we need to get started for now.
Creating a Node
The bar at the top of the screen with $ and a blinking cursor allows you to enter Cypher queries for populating and retrieving data from Neo4J.

Start by writing and executing the following to create a new Node:
CREATE (InGen:Organisation {title: 'InGen'})
CREATEwill make a new element(…)is the syntax for a node. Node = (), Relationship = []InGenis just an Alias for this node in the query; if we wanted to do more with this specific node in the statement then “InGen” is our identifier:Organisationis a label; nodes in Neo4J can be given 0..* labels to help group them together. This is one of the ways we can filter nodes later on{title: ‘InGen’}is a set of key/value properties associated with the node. This is always JSON syntax
Next let’s create 2 more nodes so we can add some relationships. Write and execute the following:
CREATE (IslaNublar:Site {title: 'Isla Nublar', country: 'Costa Roca'})
CREATE (IslaSorna:Site {title: 'Isla Sorna', country: 'Costa Roca'})
Let’s check the nodes we’ve created; running the following should show you 3 unrelated nodes:
MATCH (n) RETURN n
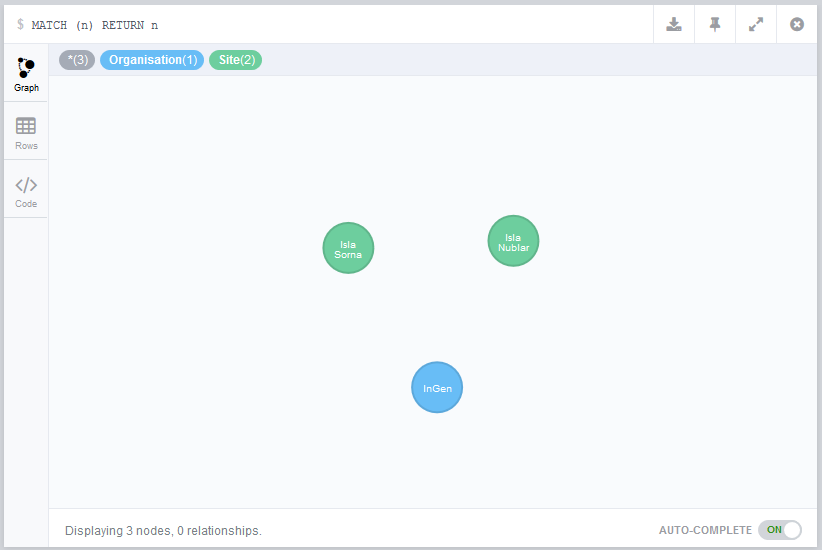
If you click on the nodes you will see a list of their contained properties on the bottom of the screen.
Creating Relationships
Onto the more interesting part of the tutorial, we’re now going to add relationships between our nodes to make the graph more useful. Run the following:
MATCH (s1:Site {title: 'Isla Nublar'})
MATCH (s2:Site {title: 'Isla Sorna'})
MATCH (o:Organisation {title: 'InGen'})
MERGE (s1)-[:OWNED_BY {label: 'Site A'}]->(o)
MERGE (s2)-[:OWNED_BY {label: 'Site B'}]->(o)
MATCHwill find 1 or more nodes or relationships that match your queryMATCH (s1:Site {title: ‘Isla Nublar’})is telling Neo4J we want to find a node with label “Site” that has a “title” property of “Isla Nublar”s1, s2 and oare alias for the matched nodesMERGEis a special command that will run an Add or Update based on the properties. - We use MERGE to ensure we don’t accidentally create 2 identical relationships between 2 matched nodes(…)-[…]->(…)creates a directed relationship between the leftmost node and the rightmost. - Note how cypher effectively represents this as ASCII art(s1)-[:OWNED_BY {label: ‘Site A’}]->(o)creates a relationship between our first site and the organisation. - The relationship has a label “OWNED_BY” (Neo4J convention is upper case for relationship labels, this isn’t enforced however)- We are storing the property “label” on the relationship as well
Now our nodes are related, let’s run a query to see how this looks:
MATCH (n1)-[r]-(n2) RETURN n1,r,n2
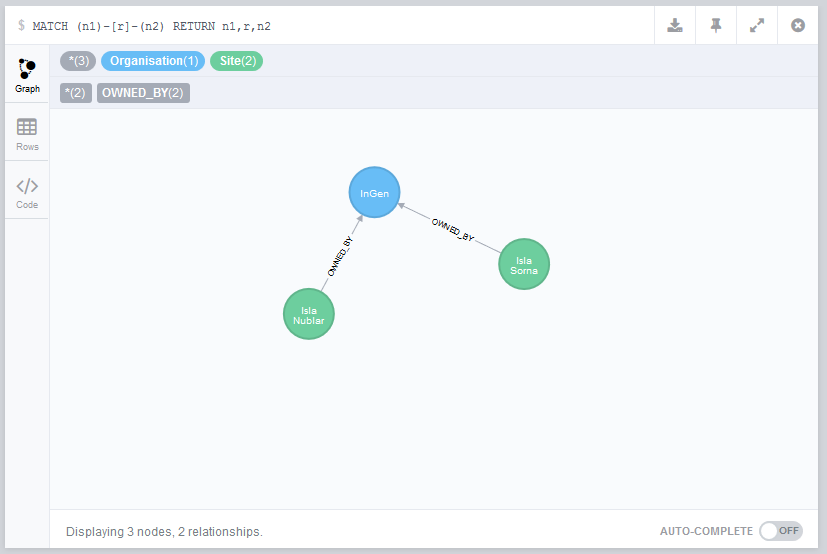
Starting to look a little more exciting. Let’s add some more nodes and relationships now.
Creating A More Complex Graph
Run the below cypher query to create some additional elements in our graph:
CREATE (JohnHammond:Person {title: 'John Hammond'})
CREATE (DennisNedry:Person {title: 'Dennis Nedry'})
WITH JohnHammond, DennisNedry
MATCH (s1:Site {title: 'Isla Nublar'})
MATCH (s2:Site {title: 'Isla Sorna'})
MERGE (JohnHammond)-[:WORKED_AT {role: 'CEO'}]->(s1)
MERGE (DennisNedry)-[:WORKED_AT {role: 'Computer Programmer'}]->(s1)
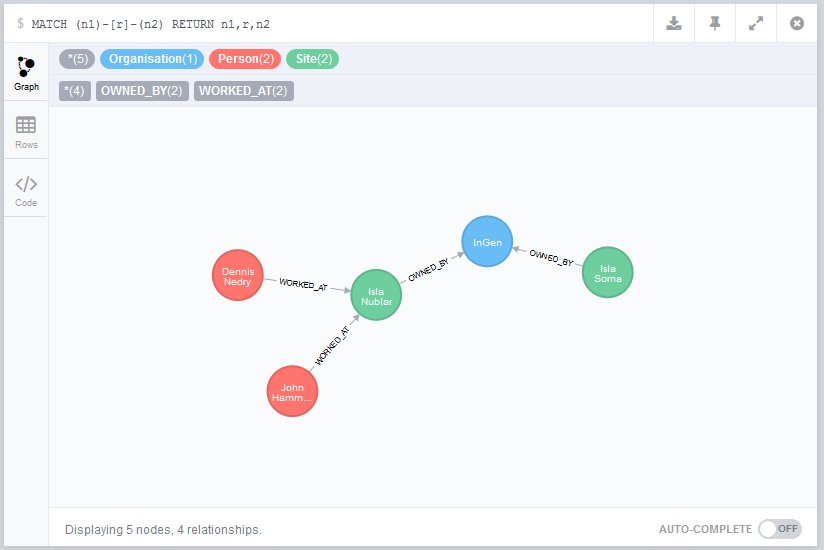
Let’s then run this query again to see what the graph now looks like:
MATCH (n1)-[r]-(n2) RETURN n1,r,n2
Useful Querying
So now we’ve mapped our totally not based on Jurassic Park organisation, how can we query this data meaningfully?
So far we’ve been using the Neo4J UI to see the graph, but if we wanted to answer questions for users we can also output tabular data.
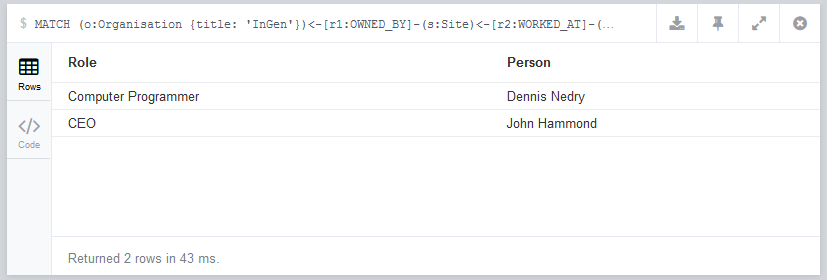
Firstly; let’s answer “Who is currently employed by InGen?” using our graph. To do this we’ll run:
MATCH (o:Organisation {title: 'InGen'})<-[r1:OWNED_BY]-(s:Site)<-[r2:WORKED_AT]-(p:Person)
RETURN r2.role AS `Role`, p.title AS `Person`;
- I’ve been quite explicit with the node and relationship labels here to demonstrate the way you can filter a larger graph
RETURN r2.role AS 'Role', p.title AS 'Person'returns the “role” property of the “WORKED_AT” relationship and the “title” property of the “Person”. - The AS syntax allows us to give cleaner names to the output like you’d do in SQL
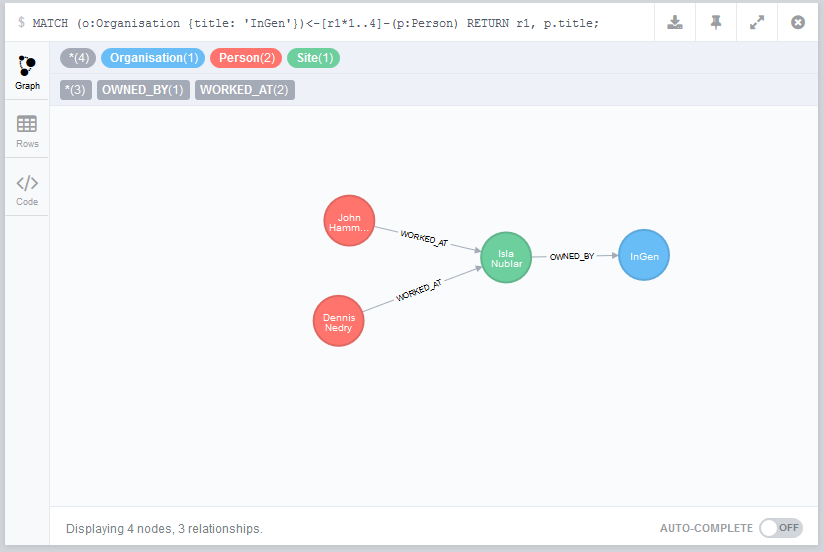
So far we’ve explicitly requested relationships in our queries, however what if we didn’t care what was between the organisation node and person node and instead wanted to hop over however many nodes to find the implicit relationship?
In Neo4J we can do that like so:
MATCH (o:Organisation {title: 'InGen'})<-[r1*1..4]-(p:Person)
RETURN r1, p.title;
[r1*1..4]tells node we want to traverse between 1 and 4 relationships between the Organisation and the Person- Doing this means we don’t have to explicitly state the Site node sitting between the two
- The downside is that this is generally a more expensive query
Then we can use this to answer another question; “Which programmers work for InGen?”:
MATCH (o:Organisation {title: 'InGen'})<-[r1*1..4]-(p:Person)
RETURN [programmer IN r1 WHERE programmer.role = 'Computer Programmer'], p.title;

Clearing the Graph
Finally, if we want to we can clear the graph of all entries like so:
MATCH (n)
OPTIONAL MATCH (n)-[r]-()
DELETE n,r
If you want to recreate the whole graph used in the tutorial the query is below:
CREATE (InGen:Organisation {title: 'InGen'})
CREATE (IslaNublar:Site {title: 'Isla Nublar', country: 'Costa Roca'})
CREATE (IslaSorna:Site {title: 'Isla Sorna', country: 'Costa Roca'})
CREATE (JohnHammond:Person {title: 'John Hammond'})
CREATE (DennisNedry:Person {title: 'Dennis Nedry'})
WITH InGen, IslaNublar, IslaSorna, JohnHammond, DennisNedry
MERGE (IslaNublar)-[:OWNED_BY {label: 'Site A'}]->(InGen)
MERGE (IslaSorna)-[:OWNED_BY {label: 'Site B'}]->(InGen)
MERGE (JohnHammond)-[:WORKED_AT {role: 'CEO'}]->(IslaNublar)
MERGE (DennisNedry)-[:WORKED_AT {role: 'Computer Programmer'}]->(IslaNublar)
That’s it for the Neo4J introduction, leave a comment if you found this useful or having any questions!