Getting Started With Pico-8

Pico-8 is a fantasy console recently featured in a Humble Bundle pack on game development.
What do the developers mean by "Fantasy Console"? Well think of it like a NES Emulator that also provides all the tools for building your own games & modifying templates others have made. For people like me who have always wanted to develop games but found the process daunting, Pico-8 represents the very best you can try to get started.
What makes it so interesting is it's limitations; specifically the screen resolution is 128x128 with 16 colours and the maximum size of the game file including sprite sheets is 32k. The developers believe that by imposing strict limitations it allows users to focus on building small games of limited scope. By forcing hobbyists along this approach it ensures any games made really do become weekend projects, rather than mountainous challenges.

Playing your first game
So first things first, you need to buy the console here for $14.99. For this you get all the game dev tools, the console itself and access to a host of game cartridges others have made to try out and modify.
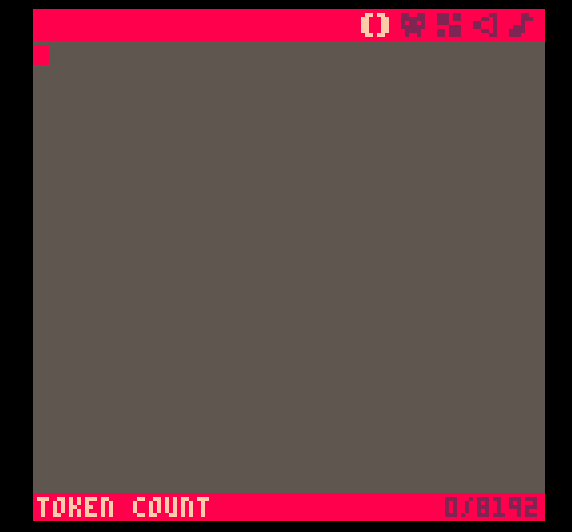
When you install and run the console you are greeted with this screen:
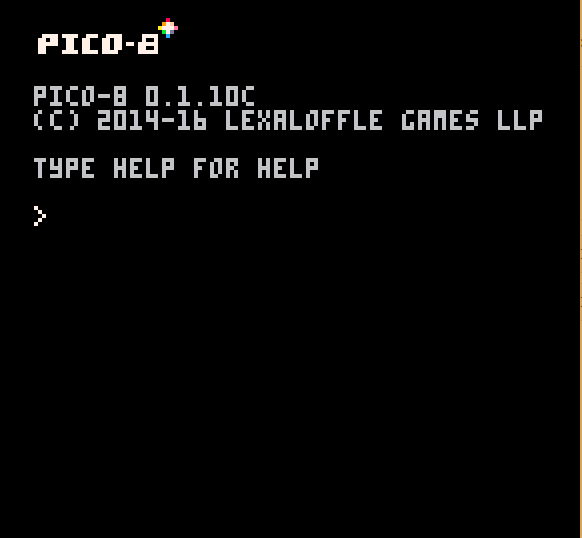
If, like me, you came from the Amiga generation, this may already give you shivers.
Here, type in "SPLORE" and press enter to go to the game browser. This lists all games other developers have published for you to play with.
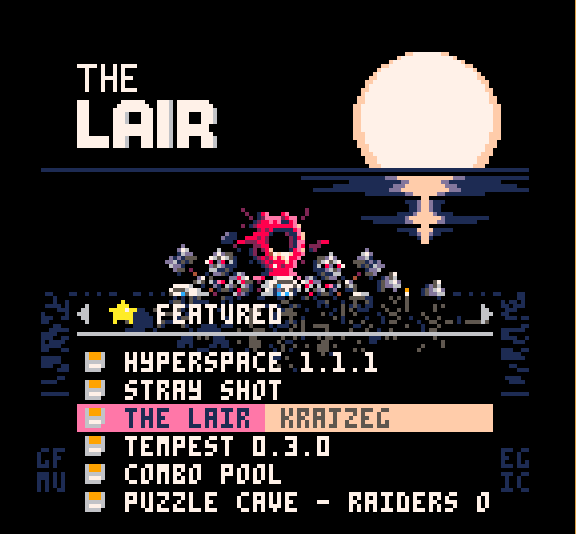
This one here is called "The Lair"; a dark side scrolling fighter. Pressing enter will download the cartridge (remember it's 32k max so it won't take long) and run the game.
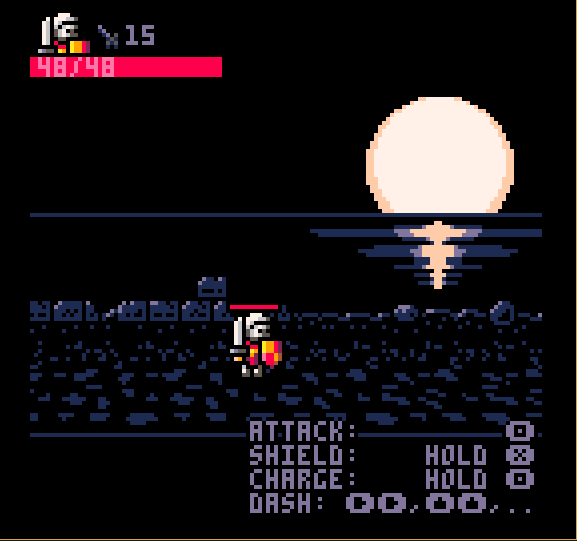
By default the controls are the up, down, left and right arrows with Z and X for actions.
Building your first game
Exit the game by pressing Escape and clicking "EXIT TO SPLORE" then Escape again to go to the command view. Here type "REBOOT" to load the machine fresh.
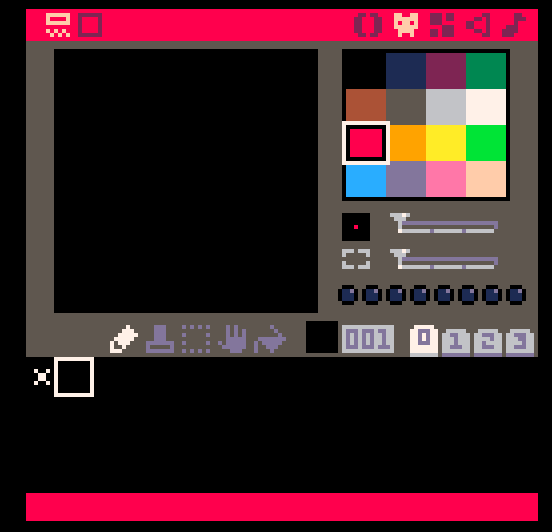
Once the console has rebooted, press Escape to see this:
This is the Lua script view which uses a cut-down version of the scripting language as the game logic.
Along the top we have 5 icons:

From left to right these are:
- Lua Code Editor - here you write the game logic
- Sprite Editor - holds all images for your game on a sprite sheet
- Map Editor - allows you to load a map of sprites in the background
- Sfx Editor - lets you create sound effects using the synthesizer
- Music Editor - compiles sfx into background music
Each of these are relatively simple tools that let you quickly build parts of your game.
To get started with the Lua Code Editor, let's write the following:
X = 64  Y = 64
FUNCTION _UPDATE()
  IF (BTN(0)) THEN X=X-1 END
  IF (BTN(1)) THEN X=X+1 END
  IF (BTN(2)) THEN Y=Y-1 END
  IF (BTN(3)) THEN Y=Y+1 END
END

FUNCTION _DRAW()
  RECTFILL(0,0,127,127,5)
  CIRCFILL(X,Y,7,8)
END
Some points to note:
- Pico-8 is case insensitive; in fact it capitalises everything for you
- Lua isn't white space sensitive
Once you've typed that in press Escape to return to the console and type "RUN" to launch the game. You should see a red ball you can move with your arrow keys:

Back to the above script:
- The
_UPDATE()and_DRAW()functions are internal Pico-8 commands that get run in the background BTN(0)is true if the button id is pressed. 0 = left, 1 = right, 2 = up, 3 = downRECTFILL(0,0,127,127,5)draws a square starting at position 0,0 to position 127,127 with colour 5 (brown)CIRCFILL(X,Y,7,8)draws a circle at the currently set X,Y position with a radius of 7 with colour 8 (red)
A (slightly) more interesting game
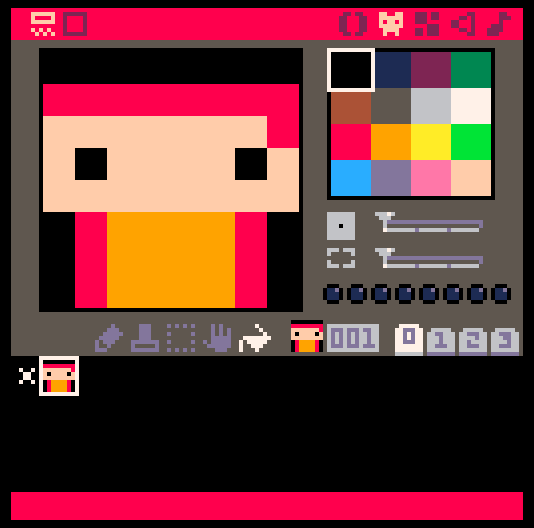
Return to the code editor (press Escape twice) and click the second tab that looks like an evil face to get the sprite editor; it looks like this:
Each "cell" in the sprite sheet is a single sprite corresponding to a number. The first is pre-filled with a white "x", that is cell 0, then from left to right it goes up cell 1, cell 2 etc.
In cell 1 I've drawn a basic character like this:
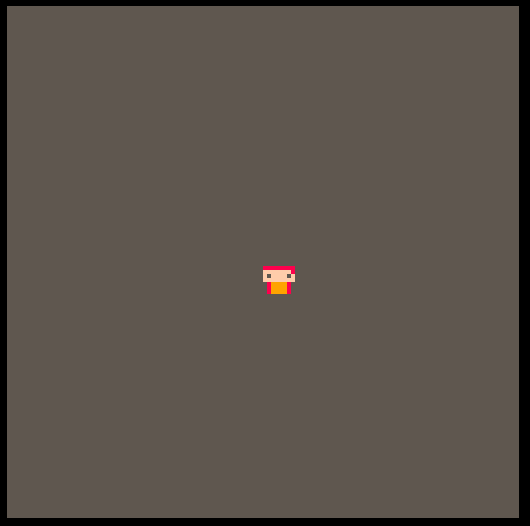
Now go back to the code editor, remove the line CIRCFILL(X,Y,7,8) and replace it with SPR(1,X,Y).
If you return to the console and type "RUN" again, you should now be able to move your character instead of the red ball.
Background maps
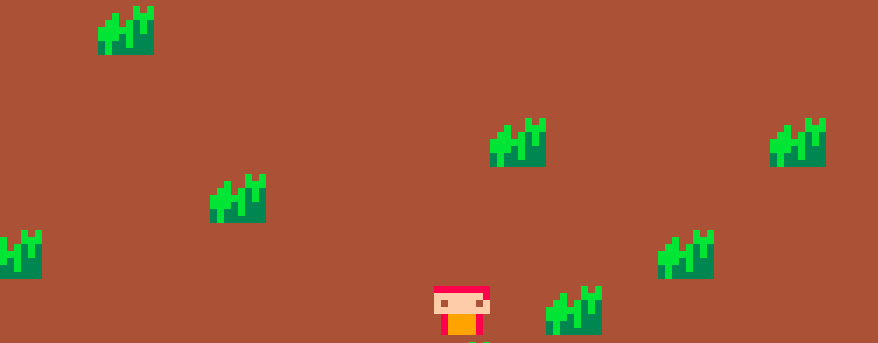
Let's return to the editor and click the second tab again to get the sprite editor. In cell 2 we want to fill the whole cell with a brown colour, then in cell 3 we'll make some happy looking grass like so:
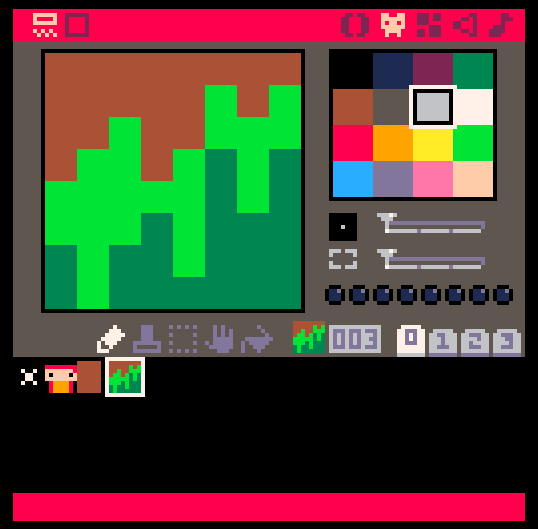
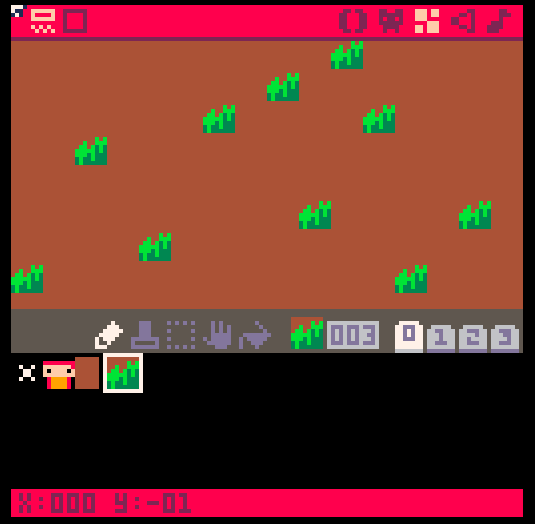
Now click on the third tab that looks like 4 squares to open then map editor. This lets us lay out a series of sprites to form our background. Firstly fill the whole visible portion of the map with the brown sprite, then place a few of the grass sprites over it like this:
Finally, go back to the code editor and replace RECTFILL(0,0,127,127,5) with:
  map(0,0,0,0,16,8)
  map(0,0,0,64,16,8)
This will draw the map you've defined, we do it twice as the map is currently only 1/2 the size of the playing area.
map(
  0,  -- Starting map X cell to draw, each cell is 8x8 pixels
  0,  -- Starting map Y cell to draw, each cell is 8x8 pixels
  0,  -- Starting pixel X to draw the map onto, total game area is 128x128
  0,  -- Starting pixel Y to draw the map onto, total game area is 128x128
  16, -- Ending map X cell to draw
  8)  -- Ending map X cell to draw
Now return to the console and run your game, it will now look like this:

Next steps
This gives you the basics for starting to build a game with Pico-8. I highly recommend reading the manual, they have gone into great detail about each tab & scripting command you can use.
The above manual has a good section on how to create your own sound effects & play them during the game. The hardest part I've seen so far is collision detection, e.g: working out when a player has hit an obstactle, the edges of the map or an enemy.
To help out, here is a sample Lua script for a basic 2 character game where the enemy chases you around a set of houses: Basic Pico-8 Game. It shows how to detect collision on the map edges and against an enemy.
Find this useful, want more info or can suggest improvements? Feel free to comment below.