Getting Things Done in Notion Using Tables

One of the key draws of Notion is the flexibility its Table functionality brings, acting as a combination of Trello, MS Access & a To-Do-List all in one. Using this tool you can set up relatively complex workflows across multiple views.
To show off this feature in greater detail, I've set up a Getting Things Done (GTD) template using a Notion table and series of filtered views.
If you haven't heard of GTD before, it is a personal management framework for organising and tracking everything you have to get done. Think of it as an approach to structuring & triaging your to do lists in a way that scales well if you get super-busy.
There is a decent guide to the approach here, and the official book can be found here; I'll also talk through the concepts at a high level when we look at the different sections of the template.
Below is a link to the template, a guide to using it, and an appendix showing you how to set it up from scratch if you wish.
Template
I've published a template version of the GTD table here:
https://www.notion.so/onodrim/ce8bc6d6b6214c52b01f2d4caf4fefbc?v=9cb89f787faf4d06b9d5dff2d1d95b07
Please feel free to click Duplicate to make a copy in your own account
I'd recommend opening the template whilst reading the article to follow along.
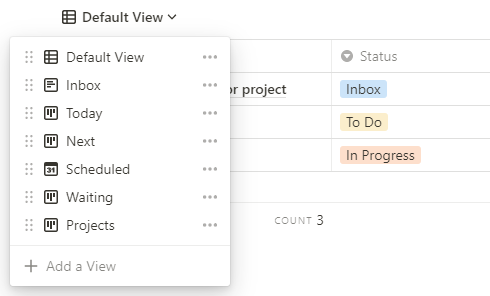
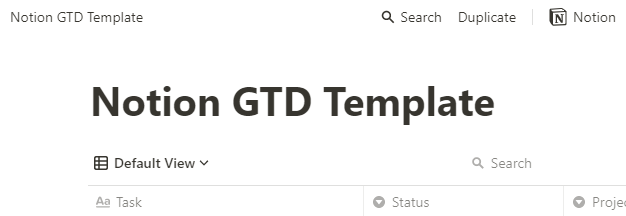
Using the GTD Table
Tables in Notion start out as a set of rows & columns, under the hood it's just like a spreadsheet. In our Default View you can see the raw data:
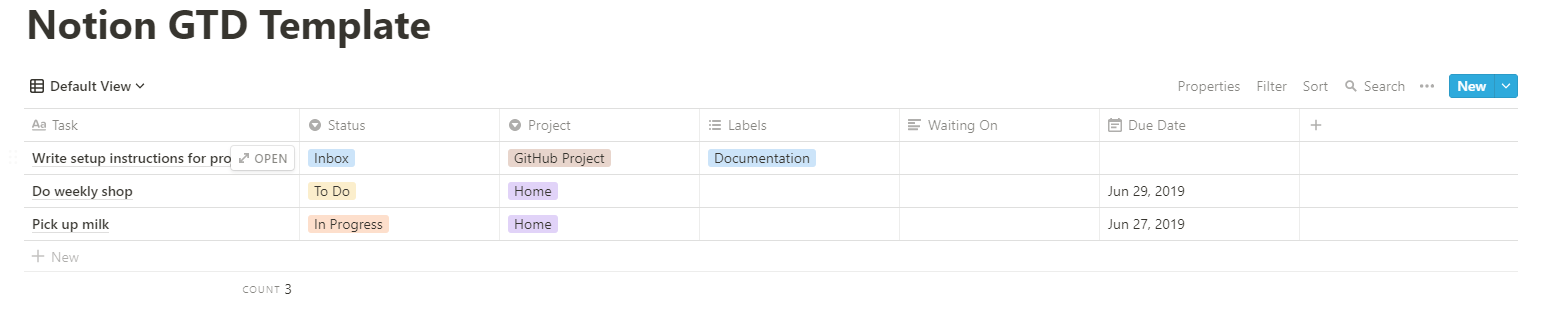
Let's talk through the columns we have here and their relevance to GTD:
- Task - Title of the task, what you have to do
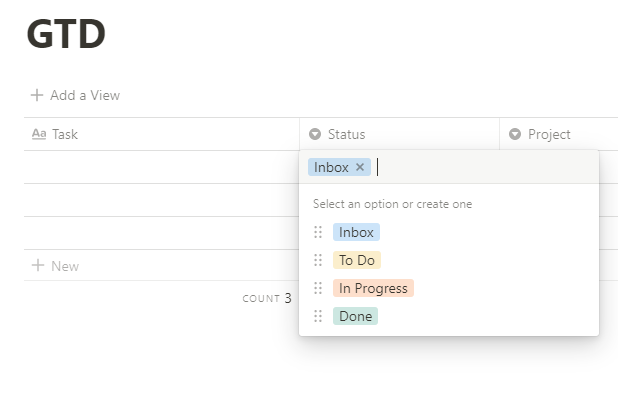
- Status - There are 5 available:
Inbox,To Do,In Progress,SomedayandDone. Inbox is a special status, anything new added to our task list should go intoInboxstatus first. This allows us to quickly raise tasks in a list (we'll see that later) to triage and prioritise later, without impacting our current focus.Somedayis another special status, this is for any task that we want to keep track of, but isn't immediately a priority. This can be ideas for future work, notes, anything that you don't have to work on now. - Project - For grouping related tasks, so you can filter down by a specific subset of todos. This could be a particular stream of work at your office, a set of improvements you want to make to the garden, whatever suits
- Labels - Similar to projects, but allowing you to sub-categorise with lots of tags to make finding related work easier
- Waiting On - If you can't do a piece of work until something else has happened (e.g: you're waiting for a reply to an email) then fill in the details here. Anything with a
Waiting Onset will not appear in yourNextlist, allowing us to filter out work you can't yet do anything about. - Due Date - The date the work has to be completed by. By GTD principles you should only set a due date if there is a time where the work absolutely has to be done by, otherwise it should sit in your
Nextlist like everything else.
Now we've got a grasp of the table structure, let's look at the various views
Inbox View
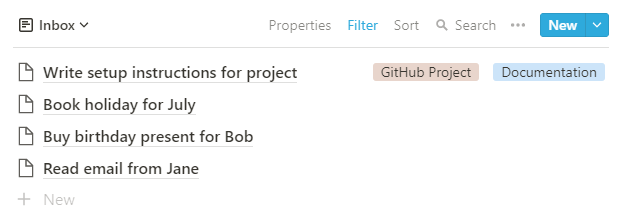
Whenever you get a new task, whether it's a new email, a request from someone or something you think of you need to do at a later date, your first port of call is adding it to your Inbox.
Think of this as a dumping ground where you can get work out of your head and into a standard space. You should try and amalgamate all things you have to do into your central Inbox, rather than having lots of places you have to remember to check.
What you then do is schedule in some time every day to go through your inbox. (I'd recommend starting with every morning). This daily "triage" process involves you looking at each item in your inbox and deciding:
- Is it still relevant, will it still provide value?
- If so, change the status to
To Do, add any detail to the work, add it to a project and label it if relevant - If applicable (and only if it has to be done by this date) add a
Due Date
This gives you an allocated time each day to process through and prioritise your work, without having to worry about dropping tasks as you know they are safely in your Inbox.
Today View
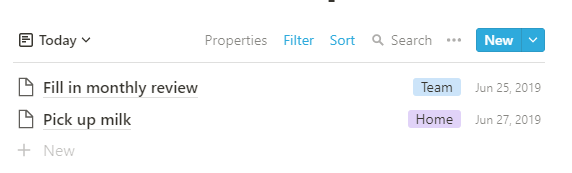
This view shows you everything you have to do today, alongside all tasks that have gone past their due date.
This should be your first port of call in the morning to find out what you have to do. Items in Today should be seen as the essentials to be finished first, before you get to your Next list.
Next View
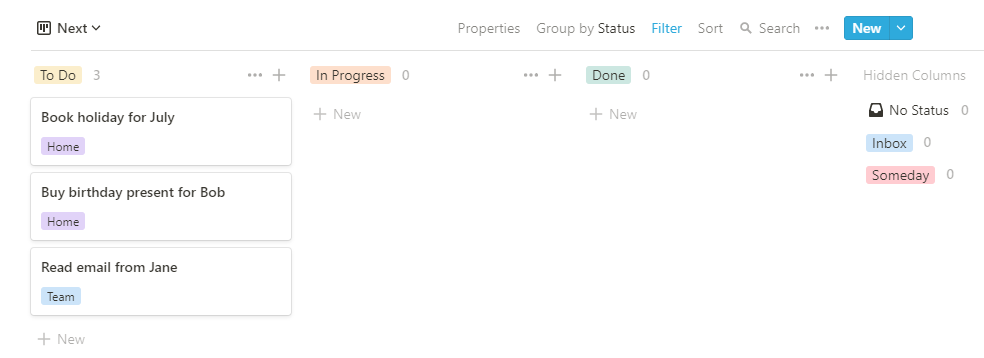
This view shows you your tasks in priority order using a kanban view very similar to Trello. Once you've completed your Today tasks, this is the work you'll focus on day to day.
An important note about this view, it doesn't show:
- Anything in your
InboxorSomedaystatus - Anything with a
Waiting Onset - Anything with a
Due Dateset
This is to get rid of things that you don't have to work on yet, or can't be worked on in the case of Waiting On; giving you a core list of tasks to focus on.
Scheduled View
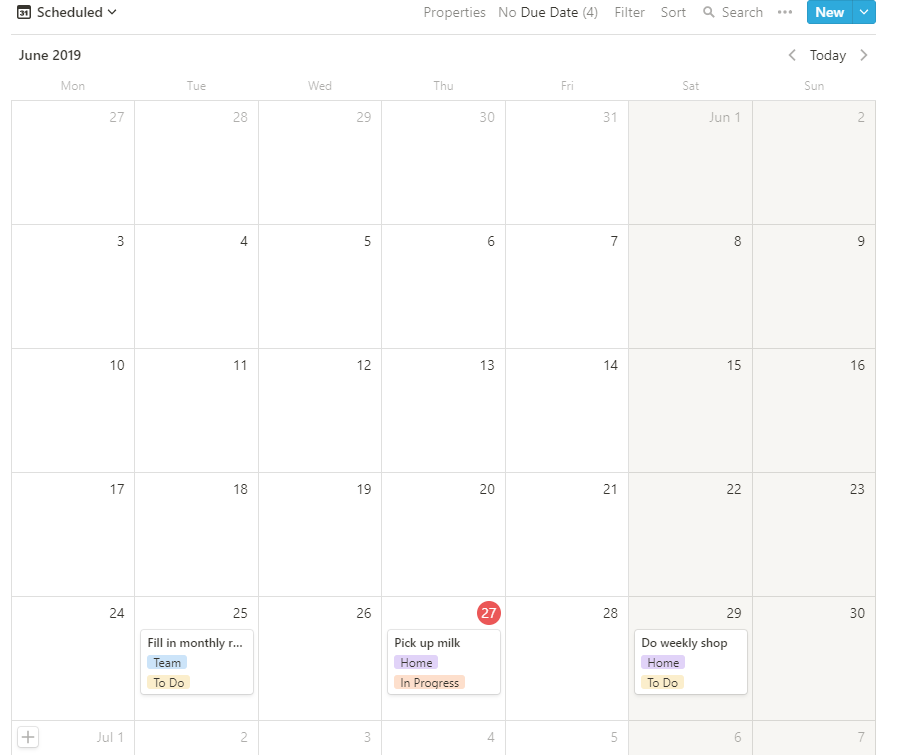
This is a calendar view of all tasks with a Due Date set so you can see what's coming up over the next few days. On the view it will show you the project the work relates to, and it's current status.
Waiting View
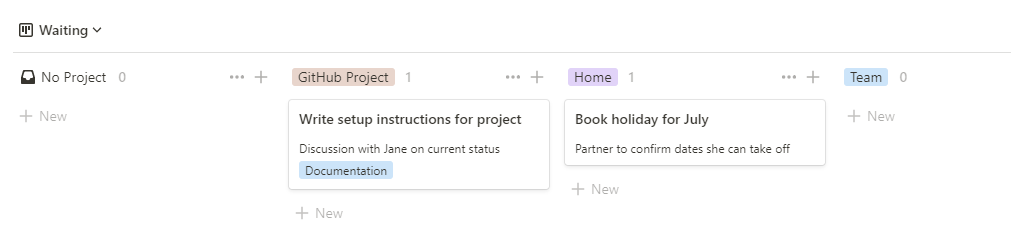
This view shows you all tasks you can't currently start due to a blocker / dependency. It's grouped by project to make it easier to deal with related dependencies at one time and lists the reason it can't be started under the card.
Once the dependency is resolved, clearing the Waiting On column will return it to the Next view.
Someday View

The Someday status is for anything you don't need to work on now, but want to keep a note of for future reference. This is useful for writing down ideas without clogging up your Inbox or Next list, and encourages you to drop work that isn't a priority without losing it.
Next Steps
That's the whole of the GTD template covered; hopefully the guide to each view was helpful and gave an overview of their use in a Getting Things Done context.
The great thing about the above approach using Notion is that, if you don't find a certain view is working, you have full control over what information is shown and how, allowing you to build your own flow.
If you'd like to see more detail on how to set up this template from scratch, read on.
If you'd like to give me feedback, please feel free to ping me on Twitter (@LukeAMerrett)
Appendix: Setup Guide
The below guide shows you how to build the GTD template from scratch. On the template linked earlier I've made a few additional tweaks so I'd recommend looking at that as well after setting this up.
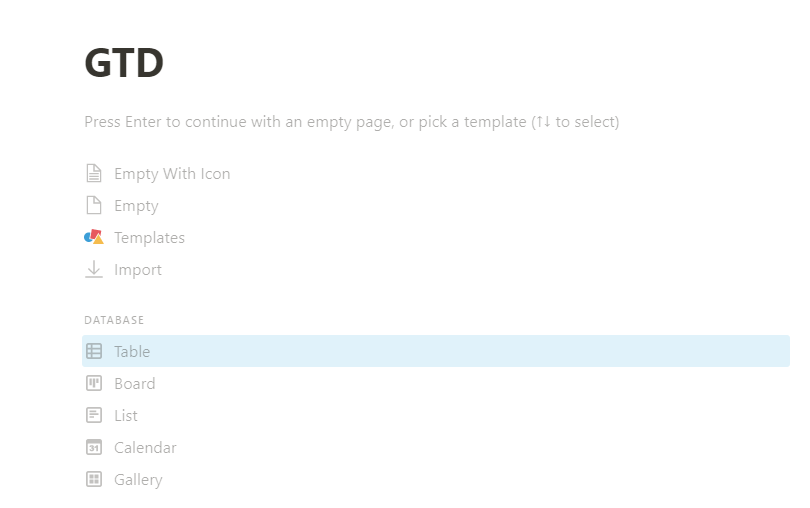
Step 1: Creating the GTD page
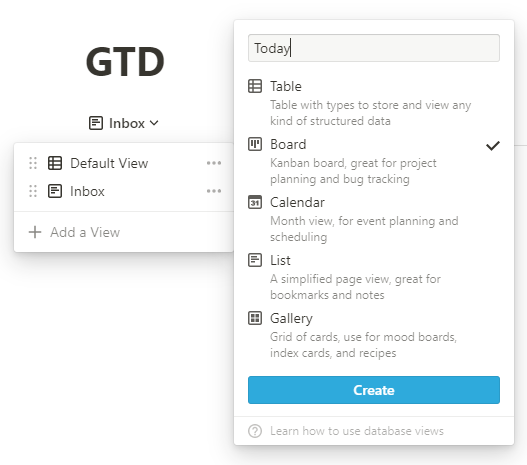
Add a new page called GTD and select Table type
Step 2: Adding the Columns
Add these columns with the types outlined
- Task - Title
- Status - Select
- Project - Select
- Labels - Multi-Select
- Waiting On - Text
- Due Date - Date

Step 3: Adding the Statuses
Go to one of the empty rows and, in the Status column, add these statuses in turn to generate our states
- Inbox
- To Do
- In Progress
- Done
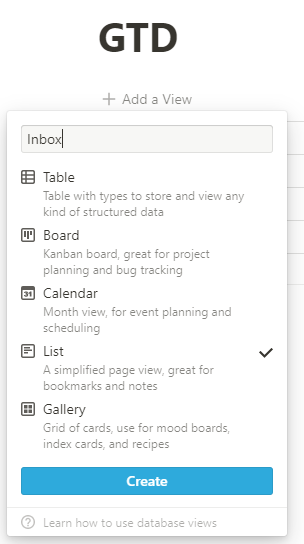
Step 4: Adding the Inbox view
Create a new List view called Inbox
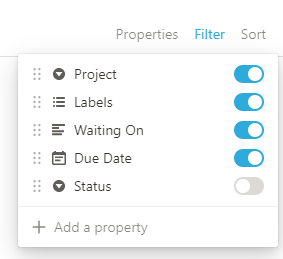
Filter the view so Status Is Inbox

Select these properties to be displayed on the list
Step 5: Adding the Today view
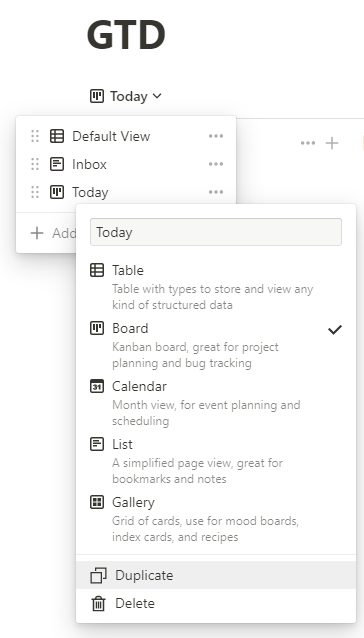
Add a new view called Today of type Board
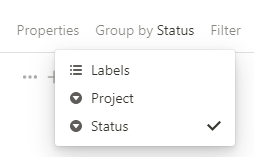
Change the Group by to Status
Hide the No Status column

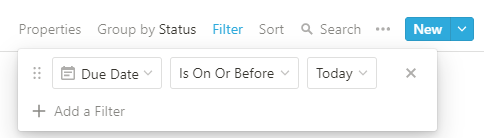
Add a Filter to only show tasks due today or overdue
Set these properties to be shown

Step 6: Adding the Next view
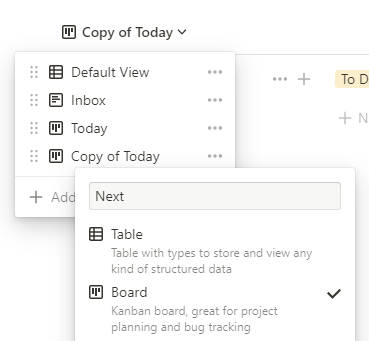
Duplicate the Today view and rename it to Next
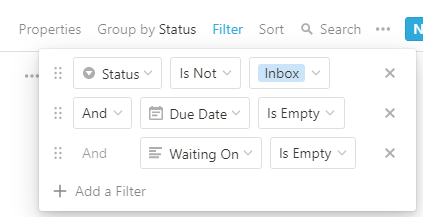
Remove the Today filter and change so Status Is Not Inbox and Due Date Is Empty and Waiting On Is Empty
We do this so the Next view doesn't show any scheduled tasks, or anything blocked waiting for someone else, cleaning up our Next view to only things we want to work on.
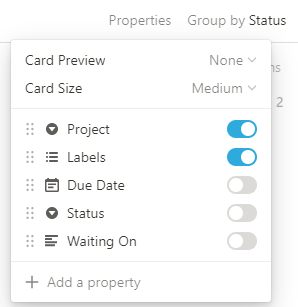
Set these properties to be shown
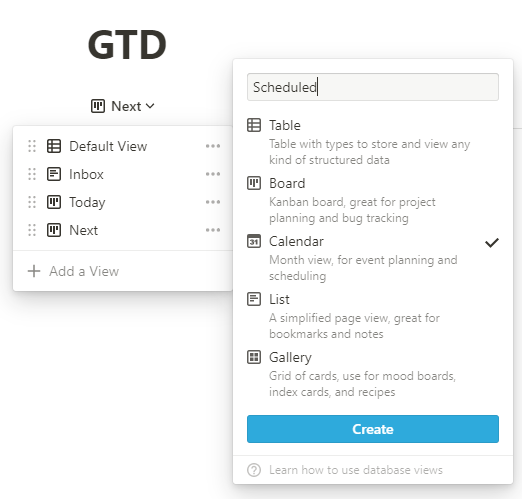
Step 7: Adding the Scheduled view
Create a new view called Scheduled of type Calendar
Change the properties show to these
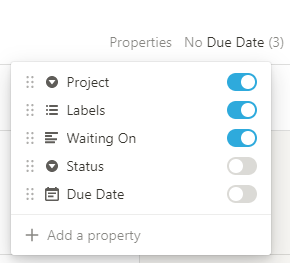
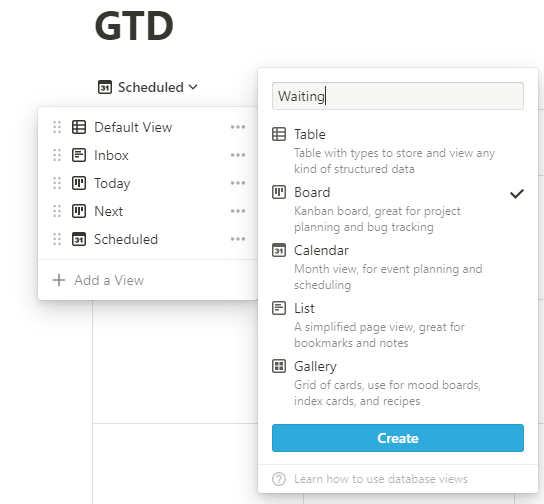
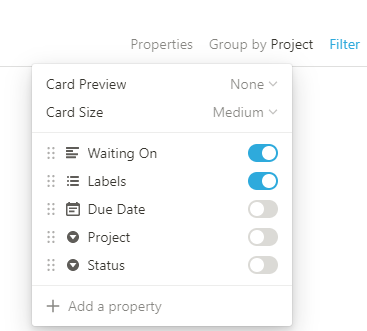
Step 8: Adding the Waiting view
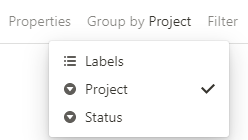
Create a new view called Waiting of type Board
Ensure the board is set to Group by Project; we're doing this so we can see where stuck work is across each project / stream of work we're on.
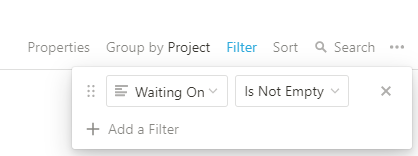
Set a new filter so Waiting On Is Not Empty
Set the shown properties to these
Step 9: Adding the Projects view
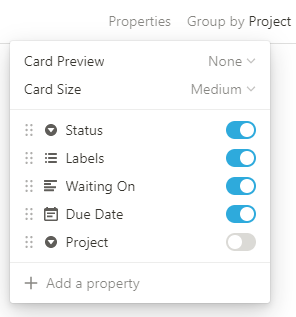
Last view, create a new one called Projects of type Board
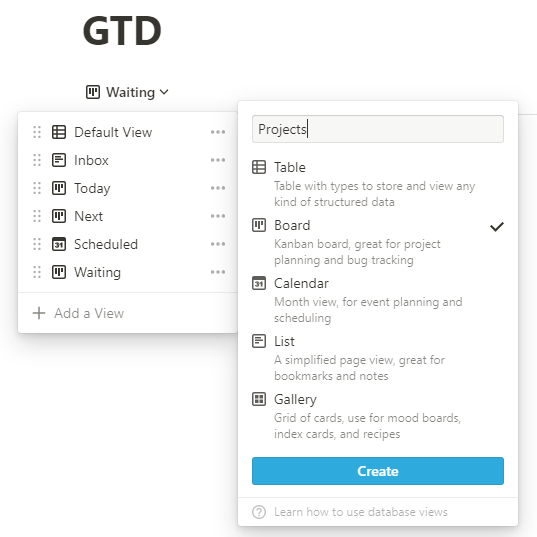
Ensure the board is set to Group by Project
Set the shown properties to these
Step 10: Done
That's it for setting up GTD in your Notion space. You can customise the filters to show what's relevant to you and add seperate views (e.g: project specific breakdowns) as you desire.